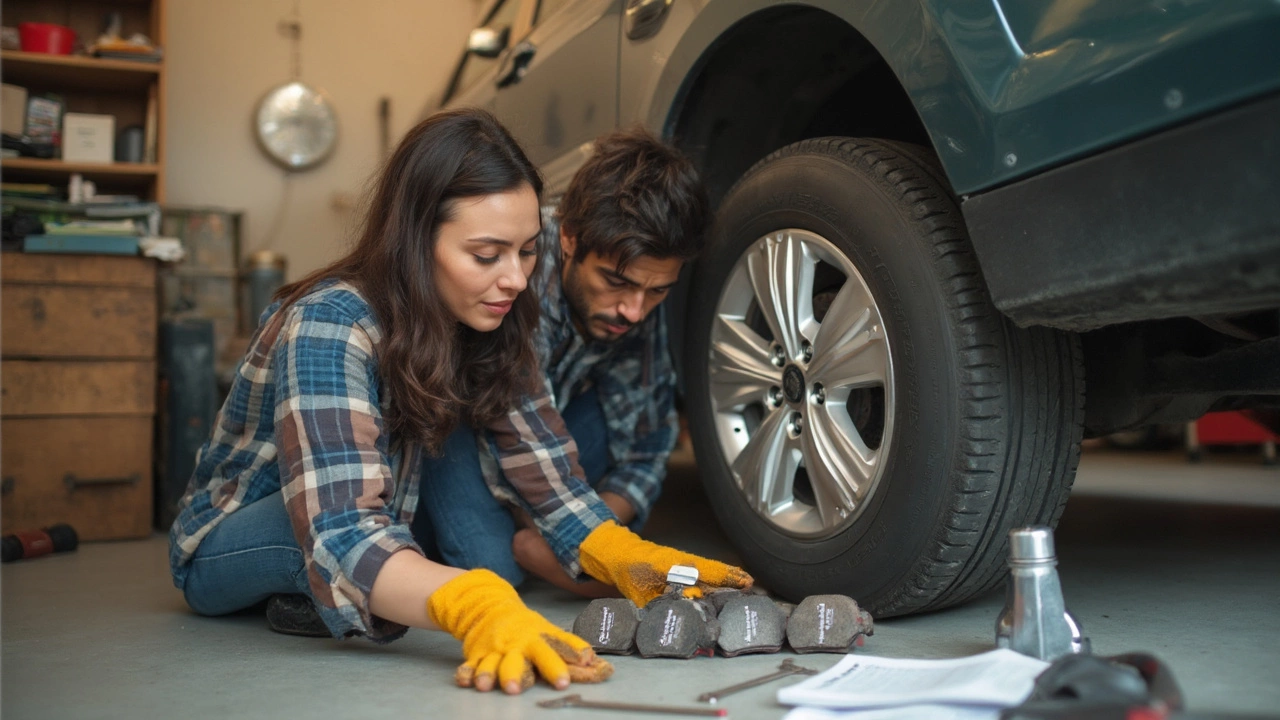
If you've ever heard that awful grinding sound coming from your brakes and felt your wallet shrink, you're probably wondering if you can just swap the brake pads yourself. You’re not alone—this is one of the first fixes people think about tackling at home. Good news: if you can tighten a bolt and follow some basic steps, you’re already halfway there.
But hold up—before you start, it’s crucial to know what you’re getting into. Changing brake pads can be pretty straightforward on some cars, but other vehicles throw you curveballs with weird calipers or specialty tools. Some folks breeze through the job in under an hour. Others end up scouring YouTube and cursing at stuck bolts for half the weekend.
This job’s not just about turning wrenches. You need to understand what those brake pads really do, know what happens if you mess it up, and be ready with the right gear. Don’t worry—I'll walk you through it step by step. You’ll find out what makes this job easier than you might think, and where things can go sideways if you’re not careful. Ready to figure out if you can really pull this off on your own?
- What Brake Pads Actually Do
- What Makes Changing Pads Tricky (and What Doesn’t)
- Tools You’ll Need (No Fancy Equipment Here)
- Common Mistakes That Make Life Harder
- Safety Stuff You Can’t Skip
- When to DIY and When to Call the Pros
What Brake Pads Actually Do
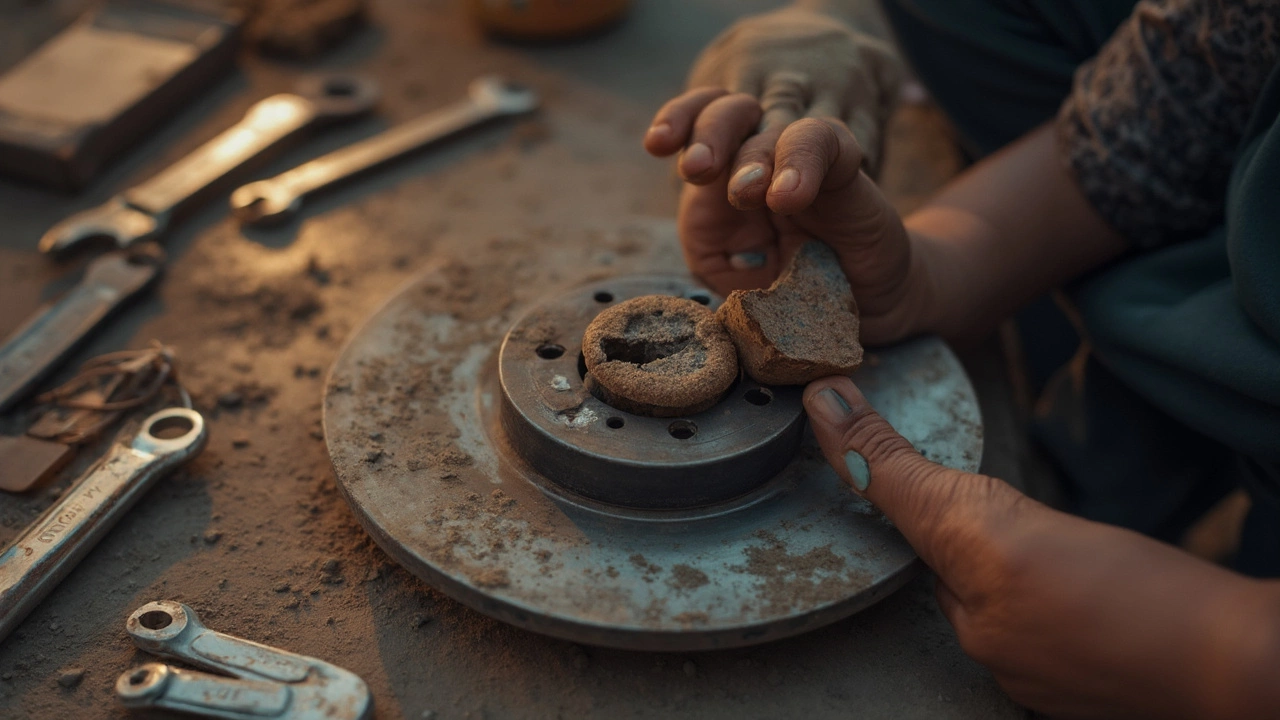
Brake pads do the real grunt work when you hit the brakes. Their job is to clamp down on the metal disc (the rotor) that spins with your wheels. When you press the brake pedal, hydraulic pressure squeezes the brake pads against the rotor. That friction is what slows your car down—or brings it to a full stop.
The cool part? Brake pads take all that energy your car is carrying and turn it into heat. That’s why after heavy braking or a long drive down a mountain, your wheels can be hot to the touch. The material they’re made from—usually ceramic, semi-metallic, or organic composites—has to be tough enough to take that heat without disintegrating.
Why not just use something softer? Well, your brake pads lose a fraction of a millimeter every time you stop. If they’re too soft, they’ll wear out in no time. Too hard, and they’ll chew up your rotors and squeal like crazy. That's why car companies spend big bucks testing pad formulas.
"Brake pads are the most critical wear component of your car’s braking system. Without them, you have no reliable way to stop," says the National Highway Traffic Safety Administration (NHTSA).
Here are a few quick facts that surprise most people:
- Even cheap brake pads can stop a car, but pricier ones usually last longer and are quieter.
- Brake pads can wear unevenly depending on how you drive or if your calipers are sticky.
- When pads wear too thin, the metal backing plate can contact the rotor—leading to that famous grinding noise.
The bottom line: healthy brake pads are non-negotiable for driving safely. If they’re shot, your stopping distance goes way up and you risk doing real damage to other brake parts.
What Makes Changing Pads Tricky (and What Doesn’t)
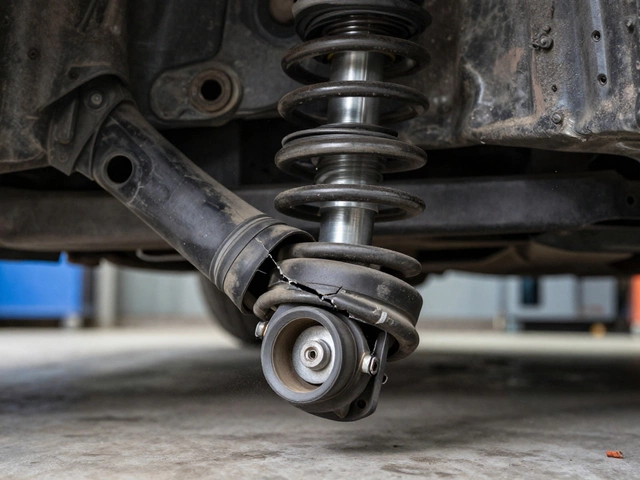
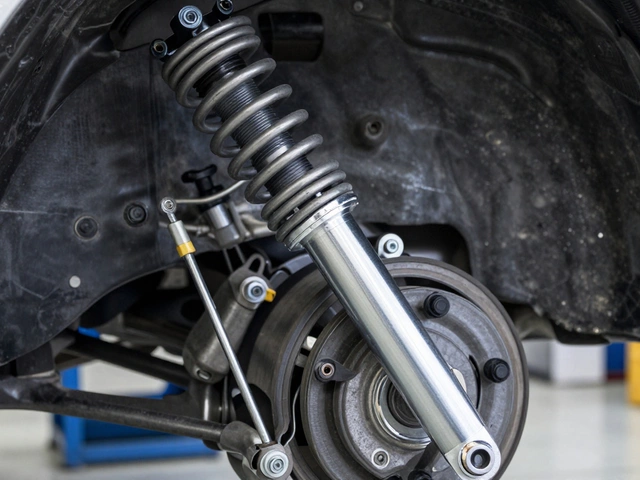
So, is swapping out your brake pads a nightmare or a cakewalk? The truth is, it depends on your car, your tools, and whether you mind getting a little dirty. Some things make the job super easy. On most modern cars, pads just slide into place after you pop off the wheel and caliper. No sweating over custom tools or mystery fasteners.
But what actually trips people up? Let’s get real:
- Stuck bolts: Rusty, rounded-off bolts can turn a quick brake pad swap into an all-day project. Older cars or ones driven in wet climates are especially bad for this.
- Hidden or oddball fasteners: Some automakers just have to make things complicated. Special-shaped bolts (like Allen or Torx) are common. Don’t be surprised if your regular wrench doesn’t fit.
- Pushing back the caliper piston: You can’t squeeze new pads in unless you push the piston back. On most vehicles, a big C-clamp works fine. Some newer cars, especially those with electronic parking brakes, need special tools or even software to do this right.
- Brake fluid leaks or mess: If you open the caliper wrong or overfill the reservoir, fluid can spill. This stuff eats paint, so be careful.
- Pad alignment: If you don’t line up the new pads right, your brakes will squeal, shudder, or even fail to work properly.
On the easy side, here's what helps:
- Disc brakes (common on front wheels) are usually easier than drum brakes.
- Common vehicles—like Honda Civics or Toyota Corollas—have tons of online guides and support.
- Basic tools usually get the job done unless your car is fancy or brand new.
One interesting fact: According to a 2023 AAA survey, about 23% of U.S. drivers say they’ve changed their brake pads at least once. Of those, more than half admitted they ran into unplanned problems—mostly from stuck bolts and hard-to-squeeze calipers.
| Part of Job | Easy On Most Cars | Can Be Tricky |
|---|---|---|
| Removing Wheel | Yes | No (unless rusted or overtightened) |
| Removing Caliper | Usually | Yes (stuck/odd bolts) |
| Pushing Back Caliper Piston | With Basic Tools | Electronic systems need special gear |
| Installing New Pads | Usually Simple | If alignment is tricky |
The bottom line: Changing brake pads isn’t brain surgery, but you will run into headaches if you dive in without reading up on your specific ride. The more you know about your car, the fewer surprises when you’re out in the driveway.
Tools You’ll Need (No Fancy Equipment Here)
Swapping out brake pads doesn’t require a pro-level garage. Most of the time, you just need stuff you’d find in a halfway decent toolbox, plus a safe way to lift your car. Forget about anything too fancy or expensive. Here’s what you'll want before taking off that first wheel:
- Socket set or wrenches: You’ll use these to take off the caliper bolts. Most cars use either 14mm, 17mm, or sometimes Allen/hex bolts. Worth checking your owner’s manual just to be sure, since there’s no one-size-fits-all.
- Jack and jack stands: Never trust the little emergency jack from your trunk alone. You need a real jack, and jack stands to keep things solid. Safety first—every time.
- Tire iron or lug wrench: This is what you’ll use to pop off your wheels. The same one that comes with your car works just fine for this job.
- C-clamp or brake caliper tool: This presses the brake caliper piston back so the new pads actually fit. Most people just grab a C-clamp that’s lying around.
- Flathead screwdriver (or a small pry bar): Sometimes stuck pads or clips need a gentle nudge.
- Gloves and safety glasses: Brake dust is nasty stuff. Protect your hands and eyes, always.
- Shop rags or towels: Wipe down that grime as you go. Makes for less mess and helps you spot leaks.
- Anti-seize or brake grease: Not strictly required but really smart if you want to avoid squeaks or seized parts next time.
You don’t need any electric impact tools or crazy expensive gear. If you’ve changed a tire and know your way around a wrench, you’re 90% set.
Check out this quick equipment guide that covers most cars built after 2000:
| Tool | Average Cost (USD, 2025) | Alternative | Why it matters |
|---|---|---|---|
| Jack & Stands | $50 - $130 | Lift ramps (with wheel chocks) | Keeps you and your car safe while working underneath |
| Socket/Wrench Set | $20 - $75 | Borrow from a friend or rent | For removing caliper bolts and other fasteners |
| C-clamp | $8 - $20 | Specialty caliper tool ($20+) | Compresses the caliper piston for the new pads |
| Lug Wrench | Usually included with car | Breaker bar | For removing wheels |
| Safety Gear | $10 - $25 | None—never skip this! | Keeps dust and grease out of your eyes, lungs, and skin |
If you’re missing any of this, your local auto parts store will usually loan out basics like caliper tools or even a decent jack. No excuses to risk it with sketchy setups or skip proper safety gear. Missing a tool? Ask around. There’s always someone who’ll loan you that last socket or clamp.
Common Mistakes That Make Life Harder
You’d be surprised how many folks run into problems doing their first brake pads job. A few simple mistakes can turn what should be a quick project into a weekend killer. Here’s what grabs people over and over.
- Forgetting to loosen the brake fluid cap: If you don’t pop that cap, you’ll have a tough time pushing the caliper piston back. Too much pressure, and you could blow out a seal.
- Mixing up hardware: It's way too easy to confuse the shims, clips, or bolts. Even a tiny clip in the wrong spot can cause uneven wear or noisy brakes.
- Not cleaning and lubricating the slides: Skipping proper cleaning means your new pads can stick or squeal. Always use some brake grease on the slide pins and contact points (not on the pad surface, obviously).
- Missing the torque spec: Hand-tightening isn’t good enough. Too tight, and you might strip threads. Too loose, and things can wiggle loose—don’t guess, use a torque wrench.
- Forgetting to bed-in the new pads: New pads need that break-in process (called bedding) to work at their best. Skip it, and you might end up with reduced stopping power or squealing.
Just to put a number on it, a study by the National Highway Traffic Safety Administration (NHTSA) found that nearly 25% of DIY brake jobs flagged in inspections had either missing hardware or bad installation. That’s a lot of cars rolling around with risky brakes.
| Common Mistake | Potential Risk |
|---|---|
| Not cleaning slides | Sticky brakes, uneven wear |
| No torque wrench | Loose wheels or stripped parts |
| Skipping bedding-in | Noisy brakes, weak stopping |
| Mixing hardware | Rattling, hardware failure |
Jonathan Ganther, co-founder of Brakes To Go, nails it:
"Missing one small detail, like a caliper spring or using the wrong grease, can lead to poor braking or even unsafe driving. The devil’s in the details."
Double-check your work as you go, and keep a tray for all those loose bits—saves you a huge headache when it’s time to put everything back together.
Safety Stuff You Can’t Skip
Messing with your brakes is no joke—this is the part of the car that stops all two tons of metal from rolling into someone’s bumper. No shortcuts. Before you reach for anything, think about personal safety and won’t-budge wheel bolts. Here’s what you can’t ignore:
- Brake pads are covered in fine dust. A lot of older pads even have asbestos. Always wear a mask—an N95 or even a cheap dust mask will keep the nasties out of your lungs.
- You need to jack up your car and keep it there. Never just use the car’s included jack. It’s too wobbly. Always use proper jack stands and put them under solid parts of the frame, not the panel. Chock your wheels so the car doesn’t roll.
- Your hands will be around sharp metal and springs. Gloves save your knuckles and keep chemicals off your skin. Not just fancy ones—any good work gloves are fine.
- Don’t leave tools or parts lying under the car where you could kick them. One bad trip and you’re in pain.
- Keep a fire extinguisher nearby. Brakes get crazy hot, and if things go sideways (like a brake fluid leak), you want to be ready.
- Work with plenty of light so you can actually see what you’re doing—don’t rely on your phone’s flashlight.
Some simple facts to remember? According to the National Institute for Occupational Safety, asbestos-related brake pad dust exposure is still a risk on vehicles made before 2000. And the National Highway Traffic Safety Administration reported that bad brakes were a factor in over 22,000 crashes in the U.S. in a single year. Messing this up can get ugly.
| Safety Gear | Why You Need It |
|---|---|
| Jack Stands | Keeps the car on four wheels, not on top of you |
| Dust Mask/Respirator | Prevents breathing in brake dust |
| Work Gloves | Saves your hands from cuts/chemicals |
| Eye Protection | Stops debris from getting in your eyes |
| Good Lighting | Lets you see what you’re actually working on |
Don’t skip the after-check, either. Once everything’s back together, pump your brake pedal a bunch before you even think about driving. This settles the pads so you won’t roll straight into the neighbor’s mailbox when you pull out.
When to DIY and When to Call the Pros
So you’re thinking about changing your own brake pads. Here’s where you need to be honest with yourself—what’s your comfort level with turning a wrench? Messing with brakes isn’t like swapping air filters. If the brakes aren’t put back together right, you’re risking your safety and everyone else's, too.
Doing it yourself makes sense when:
- You have basic tools and at least a jack and jack stands.
- You’ve checked your car’s service manual or watched videos for your exact year and model—brake pad setups can look wildly different between cars.
- Your rotors look healthy—no deep grooves, cracks, or warping. Replacing rotors is another ballgame.
- You’re not working on a car with electronic parking brakes. These can get complicated and sometimes need special tools or software resets.
- You have a few uninterrupted hours, not ten minutes before you need to drive to work.
But there are solid reasons to hand this one off to a pro:
- Your car flashes warning lights related to brakes or ABS.
- You find yourself muscling stuck bolts or parts that just won’t budge—snapped bolts can lead to bigger shop bills.
- You spot brake fluid leaks or feel squishy brakes, which could mean a problem beyond pads, like a busted caliper or line.
- You’re not confident after reading the walkthrough. If you’re second-guessing the steps, save yourself the worry.
- Your car’s under warranty or you rely on it every single day and don’t have backup wheels.
One quick note: some new cars have sensors on the pads, and you’ll need to reset or replace those, too. Skipping this step can mean warnings that won't shut off.
Plenty of folks learn this job with a buddy or a local car club. If you want to try, that’s a great way to get some real-time pointers. Otherwise, no shame in paying for pro work—peace of mind matters, especially when it comes to stopping your car safely.

Write a comment