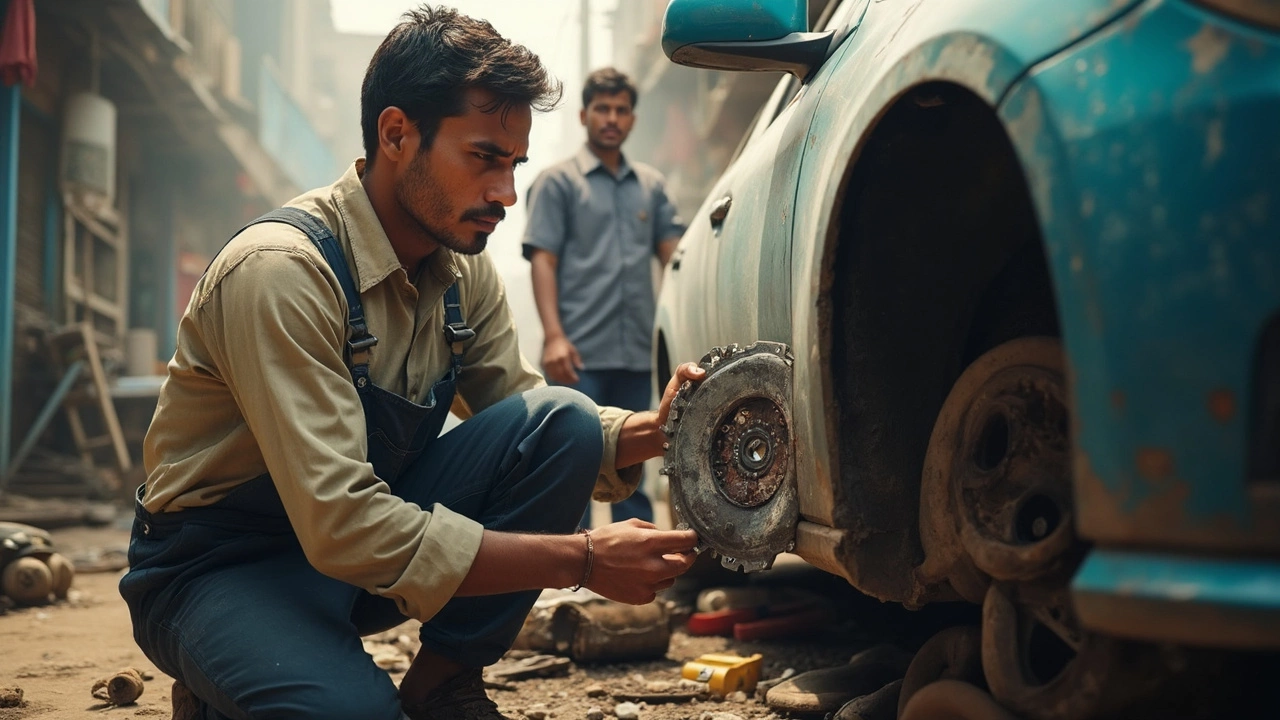
If you’ve ever smelled something burning while driving a manual, you know it’s not just your nerves frying—your clutch might be toast. A burned out clutch messes with gear shifts, ruins your driving vibe, and can even leave you stranded. The bad part? A worn clutch doesn’t heal itself—ignore it, and you’re basically signing up for bigger headaches.
So, what actually happens when your clutch burns out? You’ll notice it slipping—that’s when you press the pedal, rev the motor, but the power just doesn’t reach the wheels. Or maybe there’s a weird, gritty noise when you shift gears. Sometimes, the pedal feels floppy or bites at a random spot. And yeah, that lovely smell is your clutch material literally frying away.
Anyone who’s driven stick for a while has had at least one close call, myself included. (The last time my clutch fried, I was stuck in rush hour traffic with my wife, Felicity, and neither of us thought our relationship would make it out in one piece.) Here’s the practical stuff: if you catch the problem early, you might save the flywheel and avoid a bigger repair bill. The sooner you acknowledge the signs, the less pain for you and your wallet.
- Signs You Have a Burned Out Clutch
- Why Clutches Burn Out (And How to Prevent It)
- Should You Try Fixing It Yourself?
- Step-by-Step: Clutch Replacement Basics
- Picking the Right Clutch Kit
- Keeping Your New Clutch Alive
Signs You Have a Burned Out Clutch
Don’t play guessing games with your clutch—when it’s burned out, it gives off some pretty obvious warnings. You just have to know what to look for.
- burned out clutch smell: If you ever notice a sharp, acrid smell like burning rubber or cheese, you’re likely catching whiffs of clutch material getting cooked. This usually happens in heavy stop-and-go or if you’re riding the clutch up a hill. That smell doesn’t just ‘go away’ on its own.
- Slipping gears: Ever revved the engine and watched the RPMs jump but the car crawls forward slowly? That’s clutch slip. The clutch isn’t able to grab the flywheel, wasting power.
- Weird noises: You might hear grinding, rattling, or a chirping sound when you push the clutch pedal. That means something’s worn out or broken inside.
- Trouble shifting: If moving the shifter feels sticky or rough, or you have to force it into gear, your clutch might not be fully disengaging from the transmission.
- Pedal problems: There’s a sweet spot for how a clutch pedal should feel. If it feels too easy, too stiff, or bites at a totally different point than before, that’s a sign the system is wearing down fast. Sometimes it even gets stuck near the floor.
Check out the stats below. Drivers generally start noticing clutch slip around 60,000–100,000 miles, but if you tow, race, or drive mostly in heavy city traffic, it can fry sooner.
| Warning Sign | What It Means | How Soon to Act |
|---|---|---|
| Burning smell | Clutch disc is heating up and deteriorating | Immediately—stop and cool off |
| Slipping gears | Loss of friction, worn disc | Within days, before you’re stranded |
| Noisy pedal | Possible broken release bearing or spring | Soon—get it checked before more parts fail |
| Shifting issues | Incomplete clutch disengagement | Immediately, to prevent transmission damage |
Spot these signs early, and you might just keep the repair bill under control. Ignoring them could mean breaking down at the worst possible moment—like rush hour, in the rain, with your whole family in the car. Trust me, you don’t want that.
Why Clutches Burn Out (And How to Prevent It)
Most clutches aren’t born bad—they burn out because of something you’re doing every day on the road. If you live in a city with stop-and-go traffic or hills, your clutch already gets more abuse than it deserves. The main killers? Riding the clutch, slipping it too much when starting on a hill, and using it as a footrest at red lights. All of that means more friction and heat, which wears out the fibers in a burned out clutch.
Sometimes, people blame the car, but here’s the truth: clutch life is mostly down to driving style and care. Data collected from several auto repair shops in 2024 suggests that city drivers replace their clutch at around 50,000-70,000 miles, while those cruising highways or rural roads might get 80,000 miles or more.
| Driving Condition | Average Clutch Life (miles) |
|---|---|
| City/Heavy Traffic | 50,000 - 70,000 |
| Mostly Highway | 80,000+ |
| Performance/Track | 30,000 - 50,000 |
But mileage isn’t everything. Riding the clutch, feathering it at every start, or holding the pedal down at lights shaves years off its life, no matter your car. Even downshifting aggressively instead of braking can wear it faster.
- Keep your foot off the clutch pedal unless you’re shifting.
- Use the handbrake and neutral at traffic lights.
- Don’t hold the car on a hill by slipping the clutch—use your handbrake for that.
- Shift above 1,100 RPMs but avoid redlining every time.
- Pay attention to weird smells or slipping right away—hop on it before things get worse.
A bonus tip? If your car is loaded (think: four passengers, a trunk full of camping gear), let the clutch up slower, and give a tiny bit more gas so the engine doesn’t bog and you don’t have to slip as much. If you can train yourself (or your teenager) to respect the clutch, it’ll pay you back in fewer repairs and smoother drives—no burned-out drama.
Should You Try Fixing It Yourself?
This is where plenty of people hesitate: Can you really fix a burned out clutch in your own driveway, or should you hand this job to a mechanic? Here’s the truth—replacing a clutch is a pretty major DIY mission. If you’re comfy with tools, have a safe spot to work, and don’t mind getting greasy, it’s doable. But it’s way more involved than changing brake pads or doing an oil change.
Let’s get real about what clutch replacement usually means:
- You need to jack up the car and get under it (safely—never just a jack, always use jack stands).
- You’ll be pulling out the transmission, which can easily weigh over 100 pounds. That’s not light work.
- You’ll deal with lots of bolts and tight spots. You need a good basic socket set and possibly a torque wrench.
- It gets more complex if you run into rust, sticky parts, or can’t get the driveshaft loose. Be ready for a few hours, at least—often a full weekend if it’s your first try.
Here’s how the pros and DIYers stack up—check this table:
| Option | Average Cost (USD) | Time Needed | Skill Level |
|---|---|---|---|
| DIY | $200 - $500 (parts only) | 6-12 hours | High (confident amateur or above) |
| Pro Mechanic | $800 - $1,500 (parts & labor) | 4-6 hours | Just drive it in |
If you’re driving something common (like a Civic or Mustang), you’ll find loads of guides and video tutorials. But specialty or all-wheel-drive setups can make the job trickier; some cars need the subframe dropped, which isn’t backyard friendly.
If you don’t have the tools or experience, there’s no shame in leaving this one to a pro. But if you like a challenge and want to learn, and your ride isn’t your daily commuter, give it a shot—just block out time, ask a friend for help, and keep your phone handy for YouTube disasters. Safety, patience, and a decent toolkit matter more than heroics.

Step-by-Step: Clutch Replacement Basics
Swapping out a burned out clutch isn’t a walk in the park, but it’s doable if you know your way around a wrench and aren’t afraid of getting your hands dirty. Forget movie montages — there’s a reason shops can charge $700 to $1,000 in labor alone for this job. Here’s how it usually goes down:
- Lift the Car Safely: You need room underneath. Use jack stands, never just a jack—safety first, always!
- Disconnect the Battery: You're working around the starter and electrical bits. Cutting the power means you won’t accidentally zap something or yourself.
- Remove Transmission Components: First, take off parts blocking the transmission. This can mean axles, exhaust sections, driveshaft on rear-wheel drives. Mark bolts and take photos for reference.
- Drop the Transmission: Support the transmission with a jack. Remove bolts and electrical connections. Lower it carefully. This thing is heavy, so don’t rush it — ask a buddy to help if possible.
- Take Out the Old Clutch: You’ll see the pressure plate and clutch disc held by bolts. Remove those, then gently pry out the clutch assembly.
- Inspect and Prep: Good time to check the flywheel for heat spots or cracks. Most mechanics recommend resurfacing or replacing the flywheel, not just slapping in new parts and hoping for the best.
- Install the New Clutch Kit: Most kits come with alignment tools. Line everything up, torque bolts to spec, and follow the kit’s instructions. Replace the pilot bearing and throwout bearing too.
- Put Everything Back Together: Reverse the process. Bolt in the transmission, reconnect everything in order, and double-check tightness and connections before firing her up.
If you’re hunting for torque specs, owner’s manuals or sites like AllData are goldmines. For a ballpark idea, most clutch bolts need 18-25 ft-lbs, but don’t wing it—get the number for your exact car.
| Fact | Detail |
|---|---|
| Average DIY Time | 6-8 hours for first-timers; 3-4 hours for pros |
| Common Tool Needs | Socket set, breaker bar, clutch alignment tool, jack + stands |
| Typical Kit Cost | $100 - $350 (OEM or quality aftermarket) |
| Main Risk | Dropping the transmission or missing alignment |
| Biggest Rookie Mistake | Not resurfacing the flywheel/forgetting to replace throwout bearing |
One final tip: if you’re tackling this yourself, snap photos on your phone during disassembly. It’ll save your sanity during reassembly — especially when bolts start looking identical at midnight.
Picking the Right Clutch Kit
Grabbing any old clutch kit off the shelf won’t cut it. Your car’s make, model, engine size, and even your driving style all matter. So before ordering, double-check what fits your ride. If you’re driving a Honda Civic, for example, don’t think a Mustang clutch will magically fit. Check your owner’s manual or an online parts database for the exact part number.
You’ll see a few common types of clutch kits out there: OEM (original equipment manufacturer), performance, and heavy-duty. Here’s the lowdown on each:
- OEM clutch kits match what came stock with your car. Perfect for daily drivers who don’t push their vehicles too hard.
- Performance kits are built for racing or spirited driving. They can handle higher temperatures and more torque, but sometimes the pedal feels stiffer.
- Heavy-duty kits are for trucks and vehicles that haul loads or tow. They provide extra clamping force so your clutch lasts longer under stress.
What’s inside a typical kit? Usually, you get a new pressure plate, friction disc, release bearing, and alignment tool. Some kits add extras like a pilot bearing or even flywheel bolts, depending on your car. Here’s a quick breakdown of what those parts do:
- Pressure plate: Squeezes the friction disc against the flywheel
- Friction disc: Grips between the flywheel and pressure plate to engage/disengage power
- Release bearing: Lets the clutch pedal move the pressure plate smoothly
- Alignment tool: Helps you install everything without a headache
Some brands have better reps than others. Exedy and Luk are safe for stock replacements, while ACT and Clutch Masters are favorites for sporty builds. Don’t just eyeball the price—sometimes a “cheap” kit costs more in the long run with early failures or weird noises.
Let’s be real; the numbers matter if you’re comparing kits. Here’s how some popular kits stack up for durability and price—actual 2024 averages:
| Brand | Avg. Lifespan (Miles) | Typical Price (USD) |
|---|---|---|
| Exedy OEM | 50,000-70,000 | $120-$180 |
| Luk OEM | 60,000-80,000 | $100-$170 |
| ACT Performance | 40,000-60,000 | $300-$450 |
| Clutch Masters (Performance) | 35,000-55,000 | $350-$480 |
| Valeo OEM | 55,000-75,000 | $110-$160 |
If you use your car for city driving, stick with OEM—no need to pay extra for a power rating you’ll never use. Hauling or racing? Bite the bullet and upgrade. Also, make sure the kit you pick has solid warranty coverage. Some offer 12 months, others go up to 24 months and cover mileage. Don’t skip the small print.
Keeping Your New Clutch Alive
You’ve just spent real money and hours under your car swapping out that burned out clutch. Nobody wants to do that job again any time soon. So, how do you make sure your new clutch actually lasts? It’s a mix of driving habits, getting a quality install, and just paying attention when things feel off. Here’s how you stretch those miles.
- Always Press the Pedal All the Way Down. Half-pressing changes nothing except how fast your clutch wears out. Go for the floor every time you shift.
- Don’t Rest Your Foot on the Clutch. Sounds minor, but even slight pressure keeps the clutch engaged, and that means extra, pointless wear.
- Don’t Hold the Car on a Hill Using the Clutch. Use your handbrake or footbrake, not the clutch, at lights or in stop-and-go.
- Shift Quickly but Smoothly. Fast, rough shifts sound cool but hammer the clutch. Aim for smooth and consistent instead.
- Avoid Towing Heavy Loads (Unless You Have To). Extra weight makes the clutch work harder. Over time, that’s more heat and faster wear.
Wondering how much of a difference good habits really make? Take a look at the mileage numbers for some popular cars with manual transmissions when driven ‘normal’ versus with lots of clutch abuse:
| Car | Normal Clutch Lifespan (miles) | Abused Clutch Lifespan (miles) |
|---|---|---|
| Honda Civic | 100,000 - 120,000 | 30,000 - 50,000 |
| Subaru WRX | 60,000 - 80,000 | 20,000 - 30,000 |
| Volkswagen Golf GTI | 80,000 - 100,000 | 30,000 - 40,000 |
If you start smelling something burnt (again), or if gear changes get rough or the pedal feels different, don’t ignore it. A quick check can save you cash and keep your new clutch going strong.
And if you’ve just swapped clutches for the first time, get used to what a healthy pedal and gear change feel like. That way, you’ll catch issues way before they become wallet-busters.


Write a comment