
When your car's fuel pump decides to give up, you're left with little choice but to get it replaced. This isn't a task for the faint-hearted, but armed with some knowledge, you can either take it on yourself or better understand what your mechanic is doing. The time it takes to remove and replace a fuel pump can vary widely.
This is influenced by several factors, including the type of vehicle and the kind of fuel pump. In simpler terms, working on a compact car from the early 2000s might be less challenging than a more recent SUV. Generally, the whole process could take anywhere from a couple of hours to an entire day, depending on these intricacies.
We'll explore what's involved in fuel pump replacement, discussing everything from the preparation to the actual replacement. Alongside, you'll find some handy tips to make things go smoother and tackle any hiccups that might arise.
- Understanding the Fuel Pump's Role
- Preparation for Fuel Pump Replacement
- The Process of Removing the Old Fuel Pump
- Installing the New Fuel Pump
- Tips and Troubleshooting Common Issues
Understanding the Fuel Pump's Role
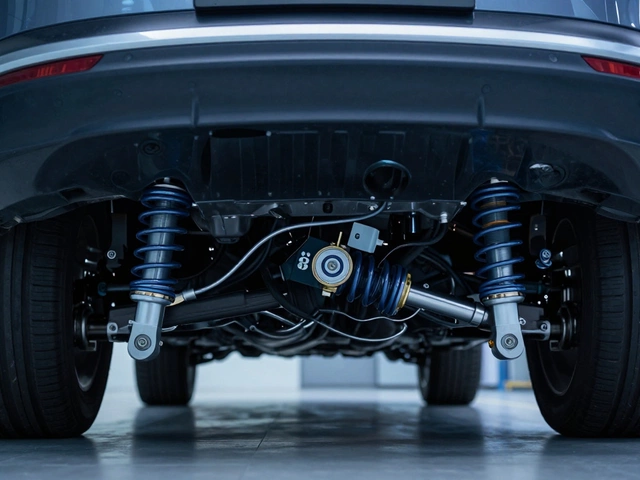
At the heart of every car's journey is a fuel pump, the unsung hero that keeps our vehicles gallantly charging down the road. A fuel pump's primary purpose is to transfer fuel from the tank to the engine, ensuring that your car has the precise amount of fuel it needs to run efficiently. This may sound straightforward, yet the precision with which it operates is nothing short of a marvel. Modern engines, particularly those with fuel injection systems, rely heavily on the constant pressure supplied by the pump, making it a critical component. Without an appropriately functioning fuel pump, your engine could stutter to a halt, or in more severe cases, refuse to start altogether.
For different cars, the type of fuel pump can vary, influencing how it performs its job. There are generally two types: mechanical and electric pumps. Mechanical pumps are mostly found in older models, driven by the camshaft or crankshaft, and operate at a lower pressure. Electric pumps are the warriors of modern automotive design, often immersed in the fuel tank itself. Designed to operate between 30 to 80 psi, they ensure fuel is delivered swiftly, especially at higher speeds or loads. A fuel pump mounted in-tank comes with its advantages, such as utilizing the fuel to keep itself cool and efficient.
When examining fuel pumps, it's vital to acknowledge the potential symptoms of a failing pump. Early signs can range from irregular sputtering, reduced fuel efficiency, to more dramatic episodes like loss of power during acceleration or uphill driving. Recognizing these can prevent further damage and costly repairs. There have been occasions where, according to the American Automobile Association (AAA), nearly 2% of breakdowns are attributed to fuel pump issues, highlighting its often overlooked importance.
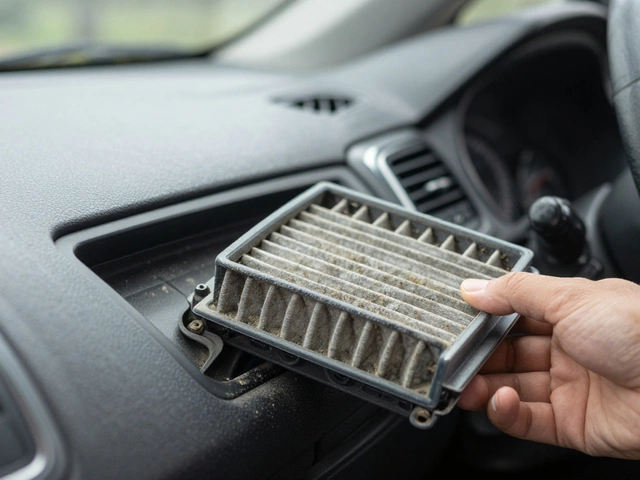
Maintenance plays a central role in maximizing a fuel pump's lifespan. Regularly changing your vehicle's fuel filter prevents debris from entering the pump, extending its working life. It's also advised not to let your fuel level drop below a quarter tank frequently, as this can cause the pump to overheat and wear out prematurely, given that it uses surrounding fuel as a coolant. For the average driver, a well-maintained fuel pump can last well over 100,000 miles, ensuring peace of mind and fewer visits to the mechanic.
Preparation for Fuel Pump Replacement
Getting ready for a fuel pump replacement involves more than just gathering the right set of tools. It's a combination of forethought, patience, and understanding the vehicle's anatomy. First off, you must know the type of fuel pump your car has. While most modern vehicles boast in-tank pumps, older or specialized models might feature in-line ones. This crucial distinction not only affects the parts you'll need but also the approach and time required for the job.
Your workspace is just as important as tools. Ensure you have ample space with proper lighting, as working under a car or checking in-tank pumps often involves intricate tasks. Safety, of course, takes precedence. Disconnect the car battery to prevent any electrical accidents and make sure the car is up on jack stands if you're working underneath. It's a procedure that demands full concentration and adherence to precautions.
Also, understanding the quirks of the specific make and model can save a ton of effort. Accessing the pump might be easy in one car and a Herculean task in another. Workshops often mention that cars like the Ford F-150 have more accessible fuel pumps, while those like certain versions of the Mazda RX-7 can test even skilled technicians' patience.
Don’t bypass the fuel pressure. Depressurizing the fuel system is critical before you do anything else. This stops fuel from gushing out when you detach the lines, which is crucial not only for your safety but also to stop any undue mess—both of which add unnecessary time to the process.
Finally, it’s beneficial to have the necessary replacement parts and tools within arm's reach. Stock up with a fresh fuel pump, replacement O-rings, and a fuel filter, if needed. Having these aligned saves time and back-and-forth trips to the auto parts store. As one seasoned mechanic puts it,
“Preparation isn’t just half the battle; in car repair, it’s almost everything.”This stage sets the wheels in motion and makes the actual removal and installation much smoother and more efficient.

The Process of Removing the Old Fuel Pump
To kick off the procedure of removing the old fuel pump, it’s crucial to understand why this component is pivotal. Without it, your engine won’t receive the fuel it needs to operate, meaning your car won’t budge an inch. The first step, and perhaps the most critical, is ensuring safety. Disconnect the battery to prevent any electrical mishaps. You don’t want any sparks flying, which could lead to a dangerous situation. With the battery safely detached, proceed to relieve the fuel system's pressure. Locate the fuel pump fuse and pull it out, then start the car and let it run until it stalls, indicating all fuel pressure has been released. Once done, return the fuse to its place.
Now, different cars have fuel systems located in various spots. In many cases, you’ll need to access the tank which is often mounted beneath the rear seats or in the trunk. This can mean removing the back seat altogether or, for trucks, simply popping open a hatch situated on the truck bed. Here’s where a bit of elbow grease comes in. If you’ve managed to get this far, you’re doing well. In some cars, reaching the fuel pump involves dropping the gas tank entirely, which is no small feat. You'll oftentimes need a hand if this is the case, given the unwieldy nature of a full tank. Remember, it's about working smarter, not harder.
Once accessible, you’ll typically identify the pump by its electrical connectors and fuel lines running to and from it. It's wise to take a picture of the setup before proceeding to ensure everything goes back in its rightful place. Careful detachment of these elements is key, as they'll need reattachment to the new unit. Keep an eye out for any signs of corrosion or damage to these parts; replacing them may save future headaches. “Quality is never an accident. It is always the result of intelligent effort,” once said John Ruskin. The same applies here, as a job completed with care now means avoiding trouble down the road.
When the lines and connectors are free, you can confidently unbolt or twist and remove the fuel pump from its enclosure. Be mindful of any gaskets or seals, which could be reused if in good condition, though often, it’s best practice to replace them with new ones to ensure a snug fit. At this juncture, it’s not unusual to find a bit of grime or muck in the surrounding area. A clean workspace is a happy workspace, so take a moment to wipe down any dirty surfaces. Remember, the time spent ensuring everything is spick-and-span could translate into a longer lifespan for your new pump.
Installing the New Fuel Pump
Once the old pump is out of the picture, it’s time to focus on getting the new one installed. This step might look daunting, especially if it's your first time, but with patience and precision, it’s quite manageable. The key to a successful installation lies in understanding the specificities of the fuel pump you are installing. Each type, whether in-tank or inline, shares similar installation steps but with different nuances that need attention.
To kick things off, it's necessary to compare the new pump to the one that’s been removed. Ensure all the ports, connectors, and mounting brackets align perfectly. Differences, even if they're small, could cause significant problems once everything is back in place. If a discrepancy is found, it might be best to consult with the manufacturer or return it for the correct model. With everything matching up, the next focus is on the integrity of the fuel lines and electrical connections. Replacing any faulty connectors and ensuring there is no debris in the fuel lines will go a long way in ensuring smooth operation.
Once you're confident that the new pump is compatible, begin by mounting it in the reverse order of removal. For an in-tank pump, cautiously lower it into the tank, ensuring the float arm does not get bent during the process. Securely tighten the retaining ring, but avoid over-tightening which could cause later issues. Connect the fuel lines accurately, making sure they fit snugly to prevent leaks. The focus then shifts to reconnecting the electrical harnesses. One tip here: apply a dielectric grease to connections to prevent corrosion and ensure a strong electrical link.
At this point, test the pump operation without starting the engine by simply turning the ignition key to the “on” position. This action should activate the pump for a few seconds, allowing you to listen for it and ensuring it’s working before proceeding. During this time, inspect for leaks; a quick sniff test and visual check around the fuel lines will reveal any issues. According to industry expert John Muir, “careful attention during this installation phase can save you countless troubles down the road.”
Muir emphasizes, it's not just about getting it in there, but ensuring that every element is correctly placed and secured to foster optimal functionality in the long haul.
– John Muir, Automotive Engineer
After all connections have been checked, replace any panels, seats, or gaskets that were removed previously. This helps maintain the car’s integrity and ensures you don’t encounter issues down the line. To finalize the installation, restoring any previously disconnected battery terminals is a small, yet critical step as it powers the entire system. With everything buttoned up, a brief test drive is recommended. During this test phase, pay close attention to any irregular sounds or a check engine light to determine if all is functioning well.
With the new fuel pump in place and operational, you should notice an immediate improvement in vehicle performance if the pump had been the sole issue. This success hinges greatly on preparation and meticulous installation, demonstrating that you don't have to be an expert mechanic to get it right, you just need to follow a methodical approach.

Tips and Troubleshooting Common Issues
When it comes to replacing a fuel pump, even the best-prepared DIY enthusiast or experienced mechanic can encounter issues. Knowing common problems and their solutions can make a significant difference. One of the most frequent issues is dealing with a stubborn fuel line that's reluctant to disconnect. Ensure you have the proper tools, such as fuel line disconnectors, designed for your vehicle type. If the line seems welded on, don’t force it. Instead, apply a bit of penetrating oil to help loosen the grips. Checking all lines for damage is crucial because brittle or cracked hoses need replacing to prevent leaks and other issues.
Another common issue is erratic fuel pressure after installation. This often happens if the fuel pump hasn't been secured properly or the fuel filter is clogged. Ensure the pump is mounted tightly and consider replacing the fuel filter simultaneously to avert such disturbances. In some cases, electrical connectivity problems arise. This might be due to a poorly secured wiring harness or damaged connectors. Always examine the wiring closely and repair any frayed wires to ensure a strong electrical current. As a respected automotive technician once shared, "Take as much time diagnosing the problem as fixing it; a good diagnosis saves headaches later."
Another tip is to thoroughly clean the area around where the old pump was located before placing the new one. Dirt and debris can easily find their way into the fuel tank and cause in-line blockage, leading to performance issues. Use compressed air to blow away any particles. Moreover, remember to take the opportunity to inspect the integrity of the fuel tank itself as many fuel pumps reside within it. Look for signs of rust or damage as these can cause future issues.
Sometimes, unexpected issues can crop up, such as changes in the vehicle's fuel efficiency or strange new noises post-installation. These can indicate a misalignment of the pump or an underlying problem with the fuel system. It's essential to keep an open mind and not rush the re-installation process. Regular maintenance checks post-replacement will help ensure everything is operating smoothly. Lastly, don’t ignore the power of community advice. Automotive forums and user groups can be treasure troves of wisdom for troubleshooting. Someone else has likely faced the exact issue and resolved it. Learning from their experiences can save a lot of time and frustration.


Write a comment