Changing a car battery at home might not sound like the most thrilling task, but it's a handy skill, trust me. Imagine not having to wait around for roadside assistance or pay an arm and a leg at the mechanic just because your car won’t start. Plus, it's one of those little things that make you feel just a tad bit invincible.
Now, let's break it down. You don’t need to be an engineer to do this, just some basic tools and safety precautions. After all, we’re talking about dealing with a car battery, so make sure you’re prepared to handle it safely. I’ll guide you through understanding when your battery needs a swap, what tools to grab from the toolbox, and the steps to take to replace your battery like a pro. Because who doesn’t want to feel like a confident car enthusiast once in a while?
- Understanding Your Car Battery
- Signs Your Battery Needs Replacing
- Gathering the Right Tools
- Steps to Remove an Old Battery
- Installation of a New Battery
- Safety Tips and Final Checks
Understanding Your Car Battery
Let me tell you, a car battery is more than just a heavy box under the hood. It’s like the heartbeat of your vehicle, the unsung hero that powers everything from starting your engine to keeping the lights on. But what exactly is inside this hefty power pack? Car batteries are typically lead-acid types, containing a mixture of lead plates and diluted sulfuric acid that work together in harmony to produce a zap of electricity. That zap is enough to ignite the engine and power all the electronics in your car. The standard car battery we’re talking about generally has a voltage of 12 volts. They come in various sizes and capacities, so you have to make sure you get the right one for your vehicle.
You might wonder how long these batteries last. Interestingly enough, the lifespan of a car battery generally spans from three to five years. However, its life is highly dependent on usage patterns and the environment it's exposed to. Extreme temperatures, both hot and cold, can affect its performance. I remember a friend in well-meaning jest comparing it to a loaf of bread – except the shelf-life is longer! But keep in mind, leaving your lights on all night or dealing with a faulty alternator can drastically shorten this lifespan.
"Today's car battery is a complex piece of technology that can still frustrate people when it fails," says an article from Popular Mechanics.
What’s fascinating is that the automotive battery's simplicity does not reflect the sophistication of its function. It doesn't just offer a continuous supply of electricity. When the engine cranks, that electricity is only for a brief burst, which requires quite a significant amount of current to turn the engine over. But here's what many might not know – modern batteries, like those found in hybrid vehicles, can sometimes contribute power for extended periods when the engine is off.
The Anatomy of a Car Battery
Picture the inner workings as a small scale chemical factory. The battery has six cells of 2 volts each, connected in series to total 12 volts. Each cell contains plates submerged in electrolyte – a concoction of water and sulfuric acid. These plates are grids made from lead and lead oxide, and they react with the electrolyte to create a chemical reaction that results in electricity. Now think about it. The efficiency of this reaction diminishes over time with wear and tear, which is why regular maintenance and testing of your battery’s state of charge are so essential.
| Average Lifespan | 3 - 5 Years |
|---|---|
| Voltage | 12 Volts |
| Type | Lead-Acid |
Whether you drive a humble hatchback or a rugged SUV, understanding your car's battery isn’t just for gearheads. It’s a piece of knowledge that can save you time and stress. Remember how keeping a loaf uncared for might lead to staleness or mold? Similarly, keeping an eye on your battery's health by ensuring clean terminals and appropriate charging can help it reach its best potential.
Signs Your Battery Needs Replacing
Spotting the telltale signs that you're due for a new car battery can really save you from frustrating surprises. Picture this: you're running late for work, you jump into your car, turn the key, and... silence. Not quite the start you envisioned, is it? One major red flag to look out for is a sluggish engine crank. If your engine takes its sweet time to fire up, it's a classic warning that your battery might be on its last legs. Cold mornings in particular can be brutal on older batteries, sapping their already diminishing strength even further.
The famous engineering professor, Dr. Howard Smith, once cautioned, "A well-maintained battery makes the difference between a smooth drive and unexpected delays."Now, if you notice that your headlights are dimmer than usual, especially when you're idling, this could signal your battery is not holding charge as it should. Another classic symptom is the check engine light flickering on. Although this light can indicate a myriad of issues, a failing battery is a usual suspect. Also, if you've been routinely jumping your car, that's your vehicle practically screaming for a battery replacement. Trust your gut—your car often tells you what's wrong; we just need to listen.
Corrosion and Damage
Look under the hood for visible signs such as corrosion. Have you noticed white, ashy substances on the metal parts of your battery? That's corrosion, and while you can clean it off, persistent corrosion often comes with a need for replacing the whole unit. Battery cases that are swollen or cracked can also not be ignored. Heat often causes this swelling, and while Auckland might not experience searing summers, any leakage or bloating is bad news.
Time and Usage
Consider the age and usage of your battery. Typically, even the best batteries shouldn't be expected to last more than four to five years. If you’ve been driving around with the same battery since prehistoric times—well, it might be time for an upgrade. Frequent short trips where the battery doesn't get a chance to fully recharge can also shorten its life. Most drivers lead busy lives, so it's easy to overlook these details until it's too late. Paying attention provides you the chance to address issues before they become full-blown repairs.
| Sign | Suggested Action |
|---|---|
| Sluggish Engine Crank | Consider battery testing/replacement |
| Dim Headlights | Check battery charge levels |
| Corrosion on Terminals | Clean and assess condition |
| Battery Age | Replace if over 4 years old |
Keeping these signs in mind as part of your routine car maintenance can save you from headaches down the road. When in doubt, stopping by a local auto shop for a quick test could give you peace of mind. After all, nothing beats the security of knowing your car battery is in good shape, ready to take you wherever your adventures or errands lead.
Gathering the Right Tools
Embarking on the journey of changing your car battery requires not just courage and a bit of patience, but also the right set of tools. It’s like being a chef in your own kitchen—sure, you might have the drive, but without the right ingredients and utensils, it's a recipe for disaster. First off, you'll need a wrench or a ratchet with the appropriately sized sockets. Most car batteries come with connectors bolted down tightly, and having this tool on hand will help you loosen them with minimal effort. Remember that car manufacturers often have slight variations in design, so it's good to have a set of sockets rather than just one size. An adjustable wrench might also come in handy just in case you hit a stubborn nut or bolt.
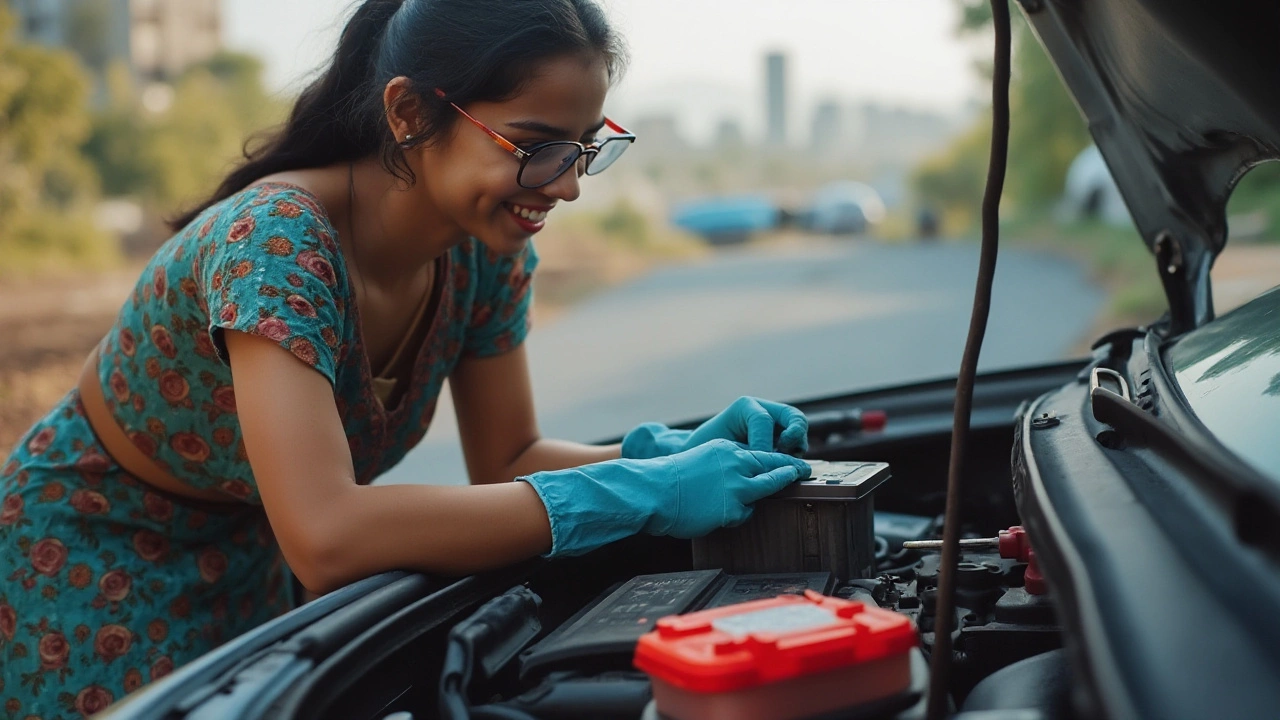
Apart from the standard toolkit, do not overlook the importance of a set of gloves. Car batteries are filled with acid, a liquid you don’t want coming into contact with your skin. A pair of durable rubber or work gloves will keep your hands protected when you’re elbow-deep in the engine bay. Also, grab some safety goggles as precautionary measures should always be taken when working with any kind of car maintenance, allowing you to avoid any unfortunate scenarios where acidic splashes could happen. Another tool worth mentioning is a battery terminal cleaner. This little contraption will help scrub away any corrosion that builds up on the terminals. Corrosion is like plaque on your teeth; it needs attention and removal to ensure a good connection.
You’d be wise to have a battery carrier or strap. Batteries are notoriously heavy and unwieldy. A carrier makes lifting and positioning so much easier, saving your back in the process. In cases where you don’t have access to one, ask a friend or neighbor to assist with the lifting. According to a recent study by the National Traffic Safety Institute, improper lifting is a leading cause of home repair injuries, steering caution in simply being physically prepared if not gadget equipped. Car battery replacement can thus remain a simple endeavor, void of unnecessary challenges.
"Preparation is crucial. Too often, people dive headlong into tasks without the necessary tools or plans." - Bob Vila
Lastly, keep a memory saver handy. This little device connects to your car’s power port and helps to maintain your car’s pre-set functions like radio settings and clock during the battery swapping process. Without it, you might have to re-enter security codes for your electronic systems, which can be a hassle. In conclusion, stocking up on these tools doesn’t just simplify the process but also instills a sense of authority over doing your own car’s upkeep.
Steps to Remove an Old Battery
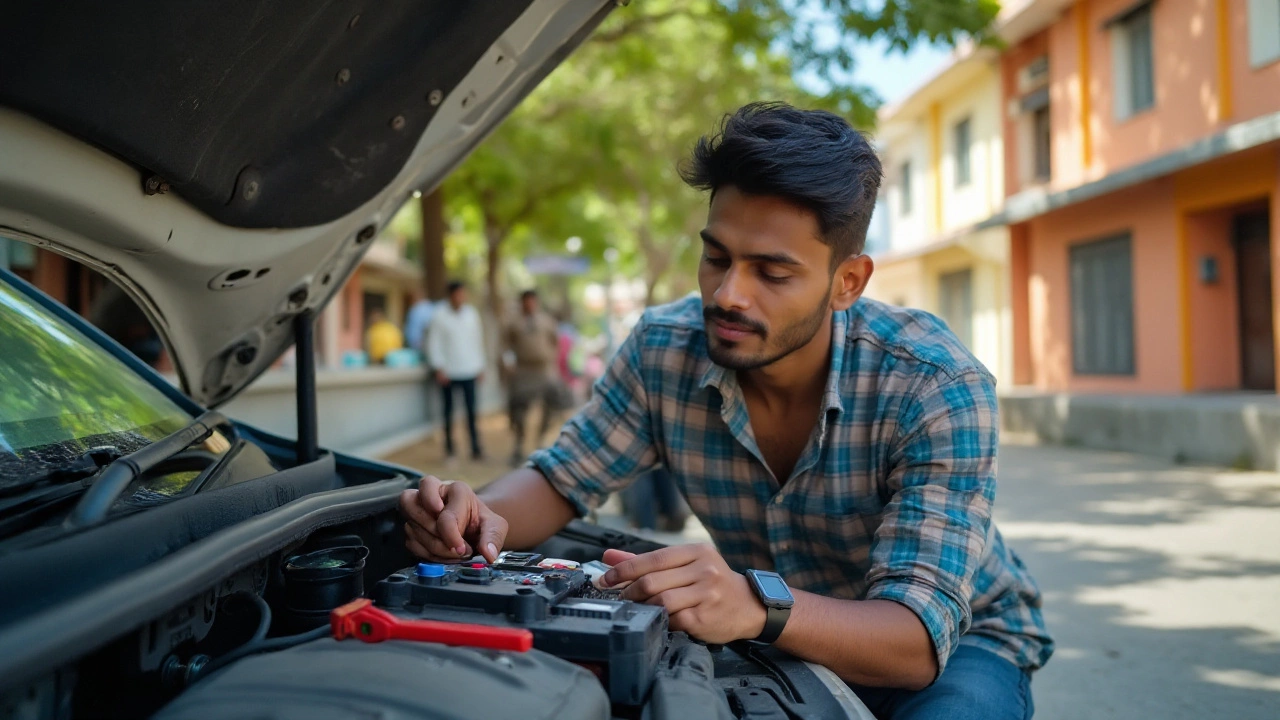
When your car grumbles to a halt and the ominous click of a dead ignition echoes, it’s time to roll up your sleeves for a car battery replacement. Removing the old battery isn't just about lugging out the heavyweight under the hood. It’s about doing it smartly and safely, ensuring you don't short out something important or end up with a chemical burn. The first step in tackling this task is to park your vehicle on a flat surface and engage the parking brake—it's a simple move but crucial to avoid any accidental roll-aways while you're getting your hands dirty. Make sure you switch off the ignition and remove the keys. This action prevents any accidental electrical discharge and safeguards your systems from potential damage.
Now, open the bonnet and locate the battery. Most of the time, it’s easy to spot amidst the complex intermingling of components. Typically, it resembles a sizeable rectangular block, sturdy yet intriguing in its silent significance. Before you jump into removing it, ensure you have your safety gear on—gloves and protective eyewear. Car batteries aren’t playthings; they contain sulfuric acid, which is hazardous if mishandled.
Once you have your gear sorted, it’s time to cut the juice. You need to disconnect the negative terminal first, and here's why: removing the negative ceases the circuit, greatly diminishing the risk of electric shorts. You’ll need a wrench to loosen the nut holding the connector—avoid metal-to-metal contact, as this can cause sparks. Carefully slide the connector cable aside, ensuring it doesn’t snap back onto the terminal post.
Following the negative, the positive terminal is next. This wire is usually red, a universal sign of danger that should remind you to tread carefully. Repeat the loosening process—ensuring a steady, controlled action—and move the cable out of harm’s way.
Now, let's chat about battery retention mechanisms. Vehicles come equipped with various brackets or clamps that secure the battery. Check if yours involves bolts or screws and get the right tools to disengage them. Place these retainers safely aside; you’ll need them later. Once the clamps are loose, the battery is free to remove, but remember, it’s heavy—around 40 pounds typically. Use both hands, and avoid yanking or sudden movements to avoid spilling any lurking acid.
"The successful handling of car batteries stems from technique and caution, not pure strength," suggests an expert from Auto Express.
Finally, inspect the battery tray for corrosion or residue. Clean up the area with a mixture of baking soda and water if necessary, and dry it thoroughly. After a clean-up, you are ready to move to the next stage: installing your gleaming new battery.
This step-by-step break-down gives you the upper hand on DIY car maintenance. With these systematic instructions, removing that old battery is a chore no more, but a well-executed operation adding to your repertoire of automotive prowess.

Installation of a New Battery
So, you've successfully removed the old battery, and it’s time to welcome that shiny new one under the hood. First off, make sure your new battery is the right size and type for your car—these details can usually be found in your car manual or the battery retailer’s guide. Placing a battery that’s too small or incompatible can lead to issues down the line. Lugging a hefty battery around calls for care, as does ensuring your car remains stable during the installation process. One slip could end up in damage to the battery, the car, or worse, yourself.
Once you've got the battery prepped, you want to gently position it into the battery tray. Ensure the positive and negative terminals are aligned correctly; the last thing you want is to mix those up. Most battery trays come with hold-down hardware, so adjusting this with a wrench ensures your battery stays snug and doesn't jostle around while driving. A loose battery can be both a noise nuisance and a safety hazard, and tightening it down ensures a safer connection, too.
Now, it’s time to connect the cables, and yes, there’s an order to it. Always start by attaching the positive cable first. This isn’t some arbitrary step; connecting the positive first prevents any sparks or shocks should the wrench accidentally contact the car's frame or body. Next, attach the negative cable, ensuring all connections are clean and corrosion-free. Speaking of corrosion, take this opportunity to clean the terminal ends and use a protective spray, which helps prevent future buildup.
Some modern cars might have a battery management system—it’s nothing to panic about, but it’s something extra to check, as it can necessitate a reset. If your car does have such a system, this could mean going into the car’s settings or even taking a short drive for everything to recalibrate itself. For those inclined to rely on trusted insights, remember the words of renowned car expert Bob Vila, who once said,
'A well-maintained battery not only keeps your car running smoothly but ensures the long-term integrity of the vehicle’s electrical system.'His advice rings particularly true in the age of smart vehicles where everything, from GPS to automated features, runs off your car's power.
Finally, perform a last check. Give the terminals a gentle jiggle to ensure they are secure. Start your car, and let it idle for a few minutes, observing how the vehicle responds. Listen for any unusual sounds, check the dashboard for any warning lights, and ensure the radio, lights, and other electronics function as expected. If everything seems shipshape, congratulations—you've successfully replaced your car battery! Now, it's a good idea to monitor how your vehicle performs over the next few days, just to be certain everything is up to par. After all, a DIY car maintenance project is only as successful as your car's performance.
Safety Tips and Final Checks
Before you even think about cracking open the hood of your car and diving into battery replacement, let's hit pause and chat about safety. Handling a car battery is not just a casual afternoon activity, after all. A car battery contains sulfuric acid and can produce explosive gases, both of which are elements you don’t want to meet unprepared. First things first, wear protective gear. A pair of sturdy gloves and some safety goggles will go a long way in keeping your hands and eyes safe from unexpected spills or sparks.
Now, let's talk location. Perform this task in a well-ventilated area. Why, you ask? Because car batteries emit hydrogen gas, and in an enclosed, non-ventilated space, this can become quite dangerous. The last thing you want is for a small spark to ignite a hydrogen-rich environment. Also, steer clear of smoking or any open flames nearby. I cannot stress this enough. Disconnecting the battery’s terminals requires care too. Always start with the negative terminal to prevent short-circuiting. Attach a wrench to the nut of the negative terminal, give it a good unscrew and then proceed to the positive.
- Ensure your vehicle is turned off completely, and remove the keys to prevent any accidental starts.
- Place your car battery upright at all times to minimize acid spillage.
- Dispose of your old battery responsibly. Many auto stores will recycle it for you.
A quick glance at the user's manual can be enlightening as well. It happens more often than not that different cars have slightly varying steps or positions where the battery is located. Remember also to verify the new battery's terminals align similarly to your old one, ensuring proper fit and function. After you've installed the battery, tighten the mounting clamps and ensure the battery is seated properly. Turn on the ignition to see if everything's in working order. If all systems are go, celebrate your successful car battery replacement!
"Good maintenance is the key to keeping your car battery healthy, and knowing the right way to replace it ensures longevity and efficiency," advises car expert Liam Robertson from Torque Automotive.
It's wise to double-check your work. Inspect the terminals to make sure they're not loose—you can give them a gentle jiggle to see if they've been secured properly. A bit of anti-corrosion spray or petroleum jelly on the terminals can prevent oxidation. This small preventive step can save you from future headaches. Finally, run your car for a few minutes, allowing the newly installed battery to click into the electrical system with ease. Seeing the dashboard light up after a job well done—that’s the true satisfaction right there. By following these steps and tips, you not only gain a useful skill but also bolster your self-reliance and car maintenance knowledge. It's a win-win!


Write a comment