Front Suspension Replacement Cost Estimator
Select Components to Replace
Control Arms
Upper and lower arms with bushings
Ball Joints
Upper and lower ball joints
Struts/Shocks
Front struts or shock absorbers
Coil Springs
Front coil springs
Sway Bar Links
Front sway bar connections
Tie-Rod Ends
Steering tie-rod ends
Estimated Replacement Cost
Parts Cost
Labor Cost
Total Estimated Cost
Key Takeaways
- When overhauling the front suspension, replace the control arms, ball joints, struts/shocks, springs, and sway bar links at a minimum.
- Inspect tie‑rod ends, bushings, and wheel bearings for wear; replace any that show play or corrosion.
- Proper tools - a torque wrench, spring compressor, and safety stand - are essential for a safe DIY job.
- After the rebuild, a professional wheel alignment saves tire life and handling safety.
- Budget roughly NZ$600-$1,200 for parts and labor if you do the work yourself.
Doing a front suspension overhaul can feel like a big project, but knowing exactly front suspension replacement entails makes it manageable. Below we break down every component you should consider swapping, why it matters, and how to get the job done without surprises.
What the Front Suspension Is
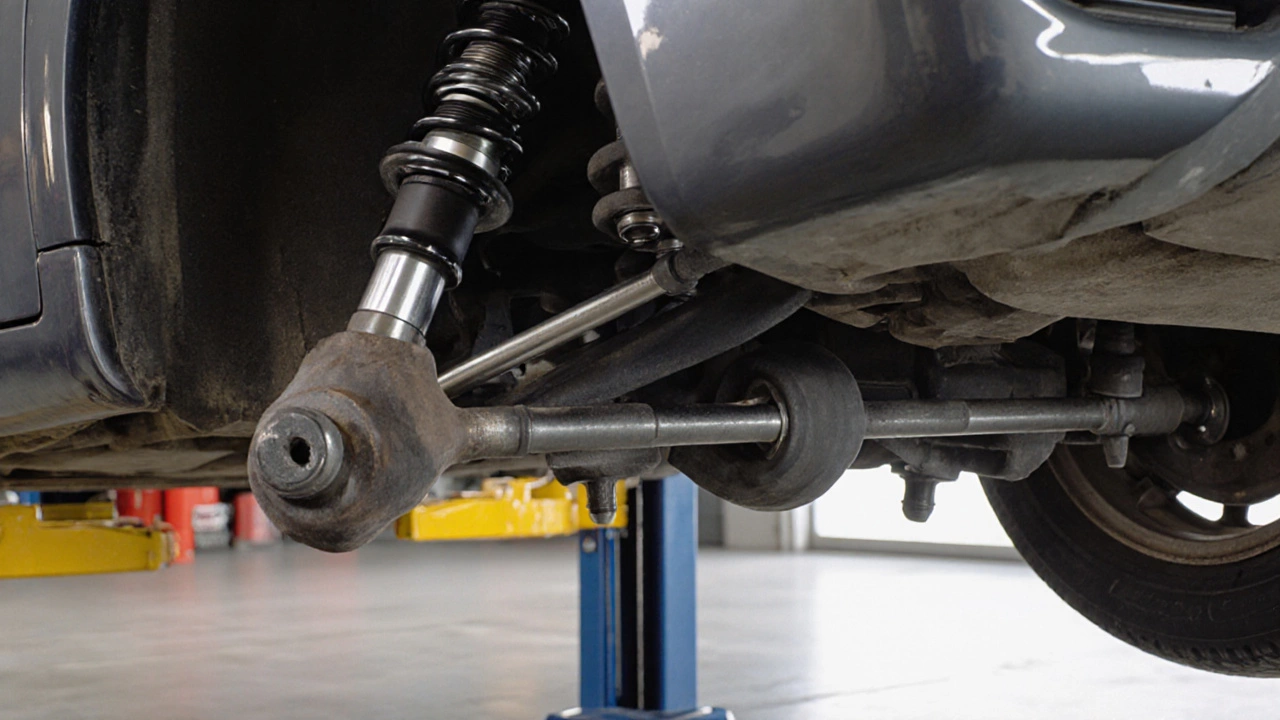
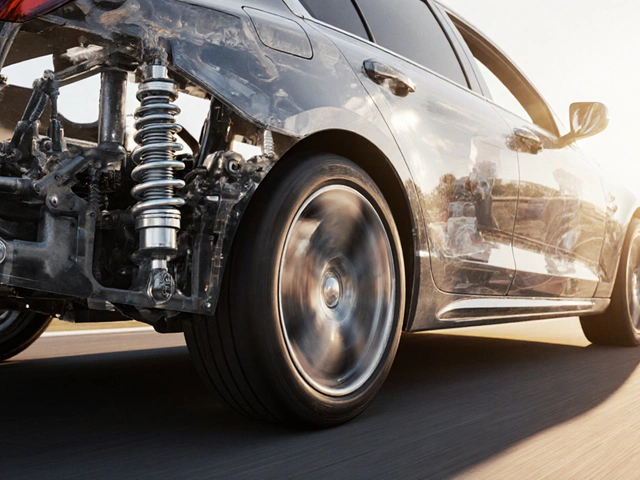
Front Suspension is the system of springs, dampers, linkages, and joints that keep your wheels attached to the chassis while allowing them to move up and down over bumps. Its job is to absorb road shocks, maintain tire contact, and provide precise steering response. A typical front‑end layout on a passenger car includes:
- Control arms (upper and lower)
- Ball joints
- Struts or shock absorbers
- Coil springs or torsion bars
- Sway bar (anti‑roll bar) and links
- Tie‑rod ends and steering rack
- Bushings, mounts, and sometimes wheel hubs
Core Components You Should Replace
Even if a part looks okay, wear on related components can shorten its life. The safest approach is to replace the following items whenever you pull the front suspension apart:
- Control Arms - They carry the wheel’s weight and house bushings. Old arms often develop cracks or worn bushings that lead to steering wander.
- Ball Joints - These pivot points connect the control arms to the wheel hub. A failing ball joint produces clunking noises and uneven tire wear.
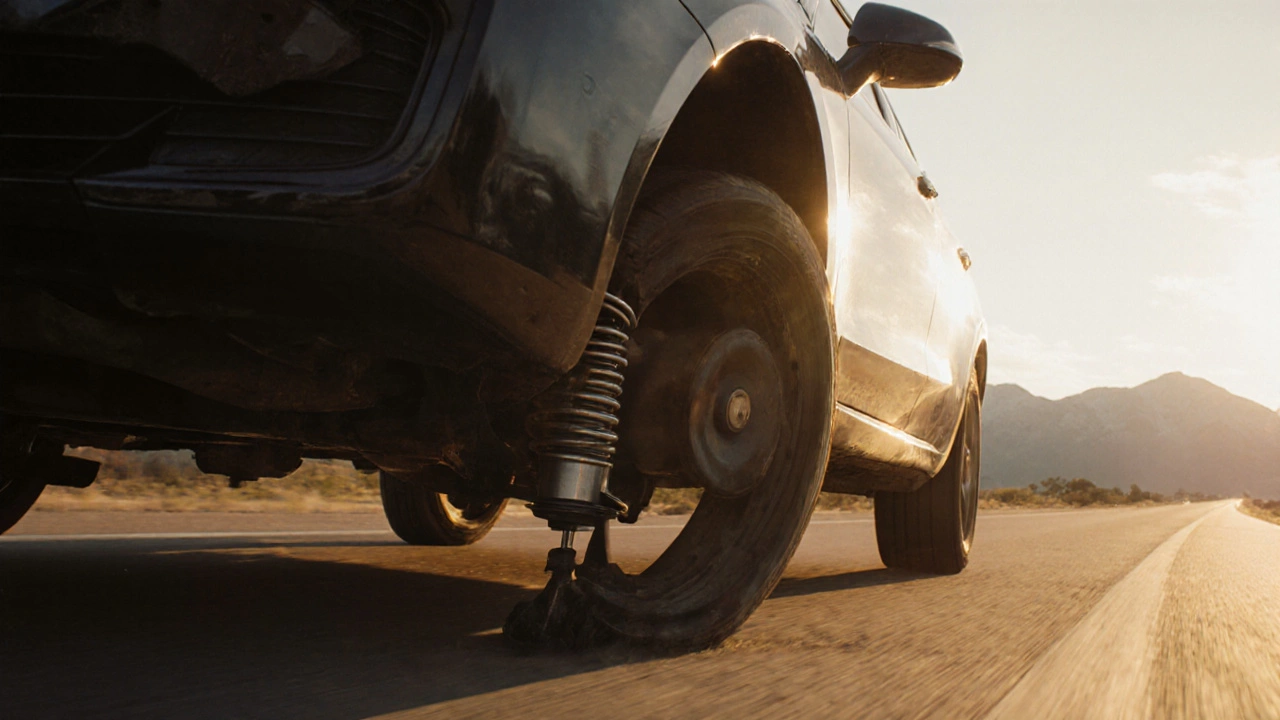
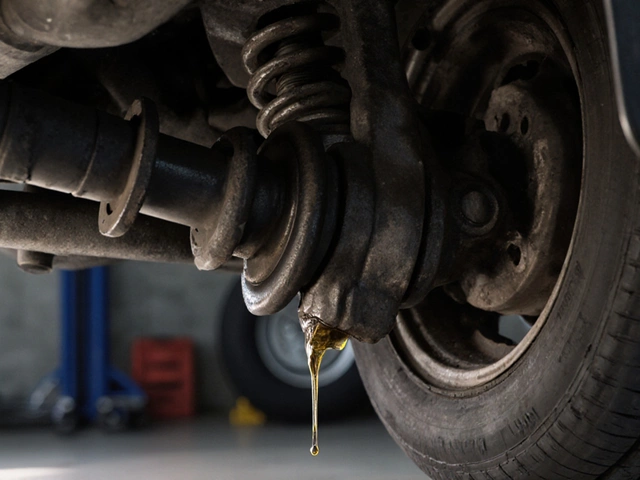
- Struts or Shock Absorbers - They control rebound and compression. Leaking oil or a broken piston means the car will bounce uncontrollably.
- Coil Springs - Springs lose their rate over time. A sagging spring changes ride height and handling balance.
- Sway Bar Links - These connect the anti‑roll bar to the control arms. Worn links cause body roll and a noisy squeak during turns.
Additional items to consider based on condition:
- Tie‑rod ends - replace if you notice play in the steering.
- Wheel bearing races - swap if you hear grinding or feel play when the wheel is spun.
- Rubber bushings (steering rack, subframe) - replace cracked or hardened parts.
How to Spot Worn Parts
Before you lift the car, a quick road test can hint at which components need attention:
| Symptom | Probable Part |
|---|---|
| Clunking when hitting a bump | Control arm bushings or ball joint |
| Steering feels vague or loose | Tie‑rod ends or ball joint |
| Excessive body roll in corners | Sway bar links or worn springs |
| Uneven tire wear (inside/outside edges) | Misaligned components, worn control arms |
| Leaking fluid from the top of the wheel | Strut or shock absorber |
Visually inspect each part after the car is raised. Look for cracked metal, torn rubber, rust, or fluid stains.
Tools and Safety Gear You’ll Need
- Jack and sturdy jack stands (rated for your vehicle’s weight)
- Wheel chocks
- Torque wrench - to tighten bolts to manufacturer specs
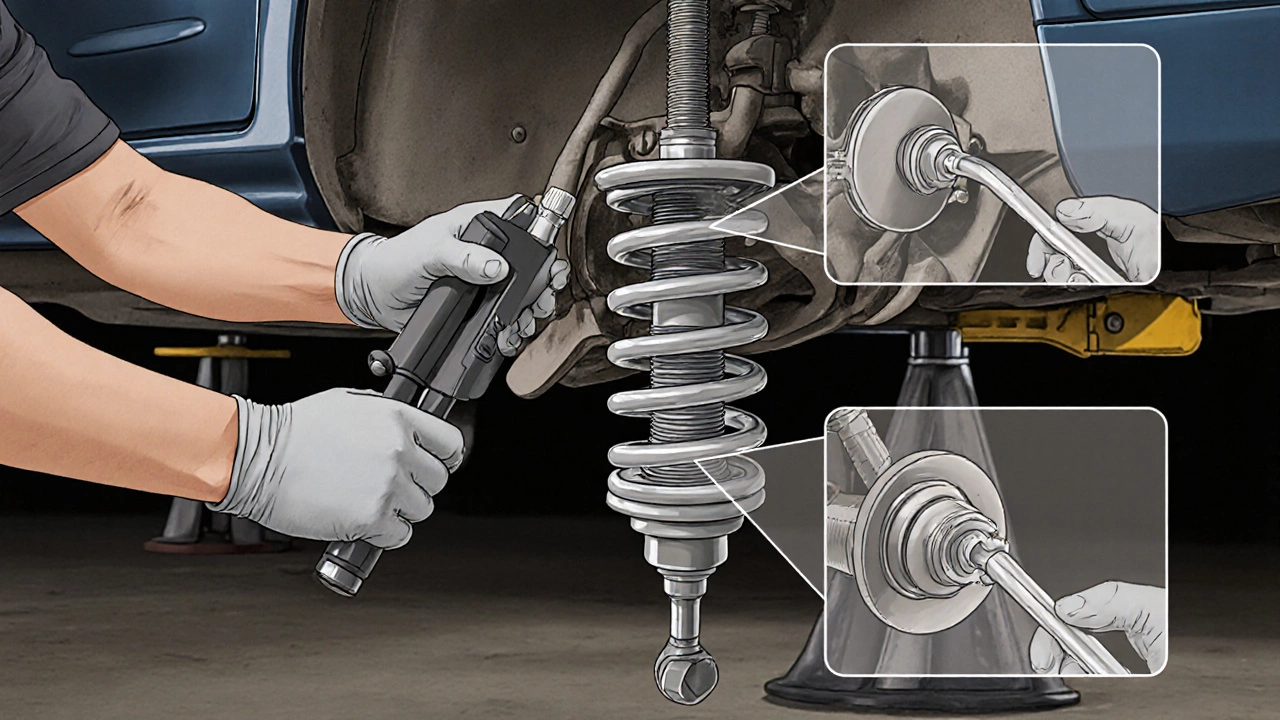
- Spring compressor - essential when removing coil springs
- Socket set with extensions and universal joint
- Pry bars and ball‑joint separator tool
- Safety glasses and gloves
- Service manual or reputable online repair guide for torque values
Step‑by‑Step Replacement Process
- Park on a flat surface, engage the handbrake, and place wheel chocks behind the rear wheels.
- Loosen the front lug nuts just enough to break static friction.
- Jack up the front of the car and secure it on jack stands. Remove the wheels.
- Disconnect the brake hose and caliper (hold it with a zip tie).
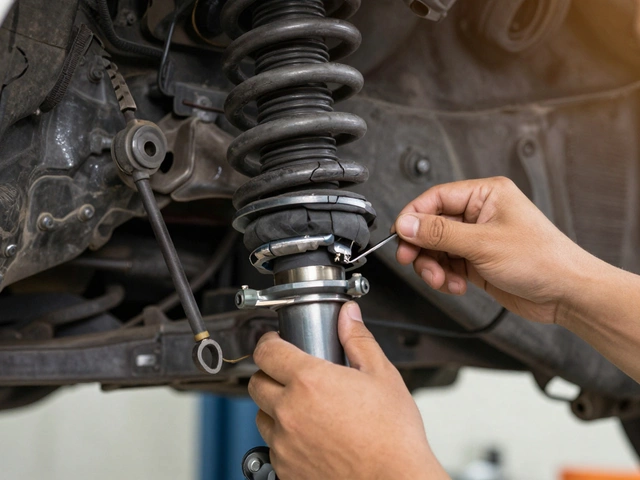
- Unbolt the upper strut mount, then use the spring compressor to safely compress the coil spring.
- Remove the strut assembly, noting the orientation for reassembly.
- Detach the lower control arm bolts, then pull the arm out of its ball‑joint socket.
- Separate the ball joint from the steering knuckle using the ball‑joint separator.
- Remove sway bar links, tie‑rod ends, and any bushings that are accessible.
- Install new components in reverse order: first new ball joint (torque to spec), then new control arm (apply fresh grease to bushings), then new sway bar link, tie‑rod, and finally the new strut assembly with fresh coil spring.
- Reinstall the brake caliper, tighten wheel lug nuts to the specified torque, lower the car, and do a final torque check.
- Get a professional wheel alignment within 24‑48hours to reset camber, caster, and toe settings.
Take your time on each torque step - overtightening can strip threads, undertightening can let parts shift under load.
Cost and Time Estimates
Here’s a rough breakdown for a typical midsize sedan (prices in NZD):
| Component | Typical Price | Labor (if outsourced) |
|---|---|---|
| Control arms (pair) | 300-500 | 2-3hrs |
| Ball joints (pair) | 120-200 | 1-2hrs |
| Struts (pair) | 250-400 | 1.5-2hrs |
| Coil springs (pair) | 100-180 | 0.5-1hr |
| Sway bar links (pair) | 50-90 | 0.5hr |
If you do the work yourself, expect to spend 6-9hours total. Add extra time if rust or seized bolts are present.
Alignment and Post‑Repair Checks
After reassembly, perform these quick checks before driving to the shop:
- Turn the steering wheel left and right - it should feel smooth with no excessive play.
- Push down on each corner of the car; the suspension should rebound quickly without sticking.
- Spin each wheel - there should be no grinding or wobble.
Once at the alignment shop, ask the technician to verify:
- Camber within the manufacturer’s range (usually ±1° for front wheels).
- Caster set correctly (often around 5-7° for front‑wheel‑steer vehicles).
- Toe reset to spec (typically 0.1°-0.2° toe‑in).
A proper alignment prevents premature tire wear and ensures the new suspension components perform as intended.
Common Mistakes to Avoid
- Skipping the spring compressor. Trying to remove a coil spring by hand can cause the spring to fly and cause injury.
- Reusing old bolts that are stretched or corroded - replace them with new hardware.
- Ignoring torque specs - over‑tightening can crack the strut mount, under‑tightening lets bolts loosen.
- Not greasing ball‑joint and bushing interfaces - lack of lubrication leads to premature wear.
- Delaying the wheel alignment - even perfect part installation won’t fix mis‑aligned geometry.
Frequently Asked Questions
Do I have to replace all front suspension parts at once?
It’s safest to replace the control arms, ball joints, struts/shocks, springs, and sway‑bar links together because they wear at similar rates and share mounting points. Other parts like tie‑rods or bushings can be inspected and swapped only if they show damage.
Can I use aftermarket parts instead of OEM?
Aftermarket parts are fine as long as they meet the vehicle’s specifications. Look for reputable brands that publish load ratings and warranty terms. OEM pieces guarantee exact fit but often cost more.
How often should I replace front suspension components?
Typical service intervals are 80,000-100,000km for struts and ball joints, while control arms can last 150,000km if the bushings stay intact. However, harsh roads, high loads, or aggressive driving can shorten those numbers.
Will a bad front suspension affect fuel economy?
Yes. Worn components cause uneven tire wear and increased rolling resistance, making the engine work harder and lowering miles per litre.
Do I need a professional to compress the coil spring?
A spring compressor is a must‑have tool for safety. If you don’t own one, renting from a local auto‑parts store is cheaper than hiring a mechanic for a short job.


Write a comment