Stage 2 Clutch: What It Is and When You Need One
If you’ve ever felt your clutch fading at higher RPMs or heard that dreaded squeal when you push the revs, you’re probably looking at a stage 2 clutch. It’s the next logical step after a stock clutch for anyone who wants more power to the wheels without rebuilding the whole drivetrain.
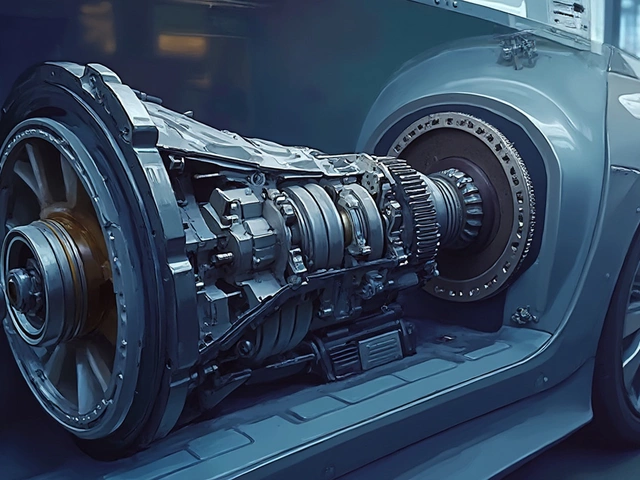
A stage 2 clutch typically uses a higher‑friction disc, stronger pressure plate, and upgraded release bearing. The goal? Move more torque without the clutch slipping, and give you a firmer bite when you launch. Most drivers notice quicker launch times, smoother shifts under load, and a noticeable reduction in heat during aggressive driving.
Why upgrade to a stage 2 clutch?
First off, if you’ve added power mods like a turbo, supercharger, or a performance exhaust, the stock clutch can become a bottleneck. A stage 2 unit handles 20‑30% more torque, which means you actually feel the gains from those upgrades.
Second, daily drivers who love spirited weekend runs benefit from a stronger clutch that lasts longer. The upgraded components resist wear, so you won’t be swapping discs every few thousand miles.
Third, the feel. A solid clutch bite gives you confidence when you shift quickly. No more hunting for the friction point or worrying about a surprise slip in traffic.
How to choose the right stage 2 clutch
Start by checking your car’s torque output. Most manufacturers list the stock torque rating; match the clutch’s torque capacity to at least 110% of that number. Look for well‑known brands – Exedy, ACT, Clutch Masters – because they provide clear specs and warranty.
Consider the clutch material. Organic plates are smoother but can fade under high heat. Ceramic or metallic plates are harsher but hold up under hard launches. If you’re doing track days, go for a ceramic‑based stage 2; for street use, an organic‑based one often feels more friendly.Don’t forget the pressure plate. A stronger plate works hand‑in‑hand with the disc. Many kits bundle both, which saves you the hassle of mixing and matching.
Finally, check the fitment. Verify that the kit includes the correct flywheel bolt pattern, throw‑out bearing, and any needed clutch slave cylinder upgrades. A mismatch can lead to premature wear or a clutch that won’t engage properly.
Installation basics and cost outlook
Installing a stage 2 clutch isn’t rocket science, but you’ll need a few tools: a transmission jack, torque wrench, and a clutch alignment tool. The process usually goes like this – disconnect the battery, drain the transmission fluid, remove the transmission, replace the flywheel (if required), install the new disc, pressure plate, and release bearing, then re‑assemble.
For most DIY‑savvy folks, the job takes 6‑8 hours. If you’re not comfortable pulling the transmission, a shop will typically charge $300‑$600 for labor, plus the clutch kit price, which ranges from $250 for a basic stage 2 to $800 for a high‑performance ceramic setup.
After installation, break the clutch in with a series of gentle launches. Avoid hard launches for the first 200‑300 miles to let the disc bed properly.
In short, a stage 2 clutch bridges the gap between everyday reliability and track‑ready performance. It lets you enjoy the power you’ve added without constantly worrying about slipping or premature wear. Choose the right kit for your torque needs, follow the install steps or let a pro handle it, and you’ll feel the difference every time you shift.

Stage 2 Clutch HP Limits: How Much Can It Really Handle?
Lots of car owners turn to stage 2 clutches for extra performance, but there’s confusion about how much horsepower these kits can actually take. This article breaks down what a stage 2 clutch really is, its real-world horsepower limits, and the factors that decide whether your setup will hold strong or start slipping. Get clear answers and practical tips, plus some common mistakes people make when upgrading their clutch.
CONTINUE READINGRECENT POSTS
-

Is it Cheaper to Install Your Own Car Battery? Costs and Pros and Cons
Discover if installing your own car battery is actually cheaper. We compare DIY costs vs. professional shops, cover core charges, and explain the risks of modern car electronics.
-

Why Upgrade to Alloy Wheels? Benefits, Performance, and Style
Discover why drivers switch to alloy wheels, from improving braking and fuel efficiency to enhancing car aesthetics and resale value.