Rotor Replacement Guide: When to Swap, Costs & DIY Steps
If your car shakes when you brake or you hear a high‑pitched squeal, the rotors are probably the culprit. Bad rotors don’t just make noise – they can reduce stopping power and wear out pads faster. Knowing the signs early helps you avoid pricey repairs and keeps you safe on the road.
Signs Your Rotors Need Replacing
First, listen for a grinding sound that doesn’t go away after a few stops. That noise usually means the rotor surface is scored or warped. Second, feel for a pulsating brake pedal; a warped rotor makes the brake caliper push unevenly, causing that wobble. Third, check the visual wear – if you see deep grooves, rust spots, or the rotor thickness is below the spec printed on the edge, it’s time for a new one.
Another red flag is uneven wear on your brake pads. When the rotors are out of shape, the pads contact them unevenly and wear down faster on one side. Finally, a brake warning light can appear if the vehicle’s onboard sensors detect abnormal rotor temperature or thickness.
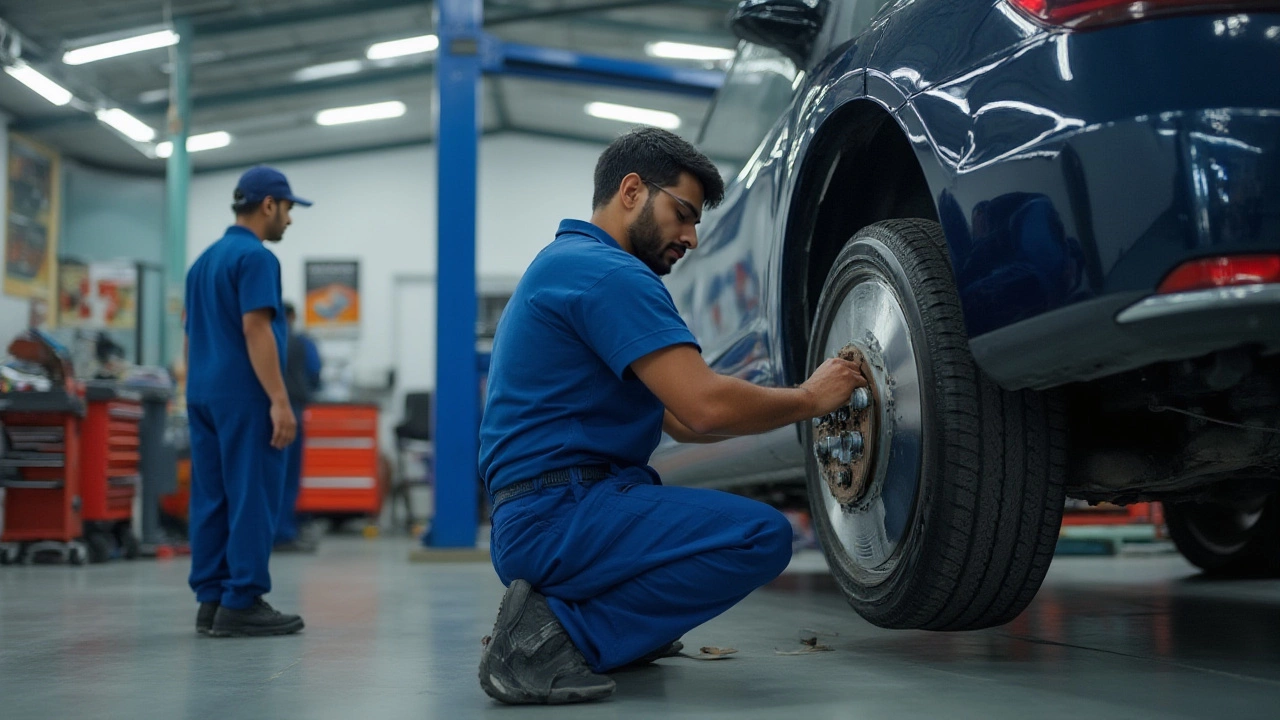
Step‑by‑Step Rotor Replacement Process
Before you start, gather the right tools: a jack, jack stands, lug wrench, socket set, C‑clamp or piston compressor, and a torque wrench. You’ll also need the correct rotor model for your make and year – check the part number on the old rotor or look it up online.
1. Lift the car and remove the wheel. Secure the vehicle on jack stands and take off the lug nuts. Keep the lug nuts in a small container so they don’t roll away.
2. Detach the brake caliper. Unscrew the caliper bolts and slide the caliper off the rotor. Hang it with a piece of wire; don’t let it dangle from the brake hose.
3. Remove the old rotor. Some rotors are held by retaining clips or screws – pop those off. If the rotor sticks, tap it gently with a rubber mallet; rust can create a strong bond.
4. Clean the hub surface. Use a wire brush to clear any corrosion or old gasket material. A clean hub ensures the new rotor sits flat.
5. Install the new rotor. Slide it onto the hub, making sure it seats fully. If the rotor has a set‑screw, tighten it to the spec.
6. Compress the caliper piston. Use a C‑clamp or piston tool to push the piston back into the caliper. This creates space for the thicker new rotor.
7. Re‑mount the caliper. Bolt the caliper back on, torque the bolts to the manufacturer’s specification (usually around 30‑45 ft‑lb).
8. Put the wheel back on. Hand‑tighten the lug nuts, lower the car, then torque the nuts in a star pattern to the recommended value.
9. Bake the brakes. Pump the brake pedal several times until it feels firm. Then take a short, gentle drive to let the new rotors seat properly.
Replacing rotors yourself can save $150‑$300 compared to a shop, especially if you already have the tools. However, if you’re unsure about any step, it’s worth getting a professional to check your work. Bad brakes are a safety risk you don’t want to gamble with.
Now you know the warning signs, cost factors, and exact steps to replace rotors. Keep an eye on your brakes, swap out rotors when needed, and enjoy smoother, safer stops without breaking the bank.
Do I Need New Rotors or Just Brake Pads? How to Tell & What to Do
Not sure if your car needs new rotors or just brake pads? Get the facts on symptoms, lifespan, costs, and expert tips to keep your brakes safe and quiet.
CONTINUE READINGRECENT POSTS
-

Why Upgrade to Alloy Wheels? Benefits, Performance, and Style
Discover why drivers switch to alloy wheels, from improving braking and fuel efficiency to enhancing car aesthetics and resale value.
-

Is it Cheaper to Install Your Own Car Battery? Costs and Pros and Cons
Discover if installing your own car battery is actually cheaper. We compare DIY costs vs. professional shops, cover core charges, and explain the risks of modern car electronics.