Brake Pad Install: DIY Guide and Pro Tips
When working with brake pad install, the process of removing old brake pads and fitting new ones on a vehicle. Also known as brake pad replacement, it directly affects how quickly your car can stop and how smoothly it feels on the road. Understanding the basics before you start can prevent costly mistakes and keep you safe. Brake pad install encompasses removing old pads, cleaning the caliper, and fitting new pads – a clear three‑step flow that most DIYers follow.
Key Parts and Tools for a Successful Install
Every solid brake pad install relies on a handful of core components. First, the brake pads, friction blocks that press against the rotor to slow the wheel come in ceramic, semi‑metallic, or organic formulas, each influencing stopping distance and noise. Next, the brake rotor, the metal disc that the pads clamp onto must be clean and free of scoring; a smooth rotor surface reduces brake pad wear and keeps pedal feel consistent. The brake caliper, the housing that pushes the pads against the rotor holds the pads in place and requires proper torque on its bolts – a correct torque specification ensures the caliper bolts hold the pads securely. Finally, fresh brake fluid, the hydraulic fluid that transfers force from the pedal to the brakes is essential; using new fluid influences brake pad performance and prevents air bubbles that can spongify the pedal. Together, these parts form the backbone of any brake system, and having the right tools – a jack, lug wrench, C‑clamp, and torque wrench – makes the job smoother.
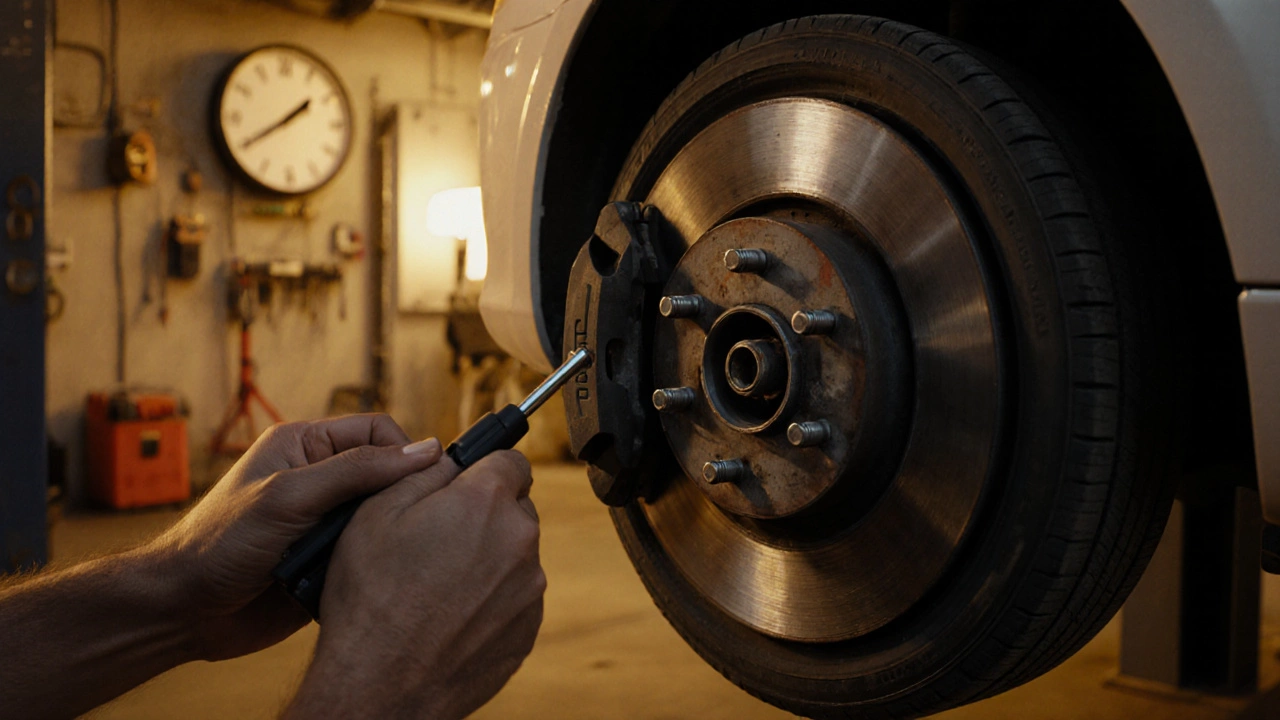
Now that you know the parts, the actual install follows a logical sequence. Start by safely lifting the vehicle and removing the wheel; this gives you access to the caliper. Open the caliper bolts, swing the caliper aside, and pull the old pads out. Inspect the rotor for deep grooves; if it’s scored, consider resurfacing or replacing it. Before seating the new pads, compress the caliper piston with a C‑clamp or brake tool – this step readies the caliper for the thicker, fresh pads. Slide the new pads into their slots, re‑mount the caliper, and tighten the bolts to the manufacturer’s torque spec. Finally, bleed the brake fluid if you opened the system, then pump the pedal a few times to seat the pads against the rotor. After a short test drive, you should notice firmer pedal feel and consistent stopping power. This hands‑on approach not only saves money but also gives you confidence that the brakes are installed correctly. Below, you’ll find a curated set of articles that dive deeper into each of these steps, cover common pitfalls, and offer pro‑level tips to keep your brake system in top shape.
Brake Pad Replacement Time Guide: How Long Should It Take?
Find out how long a brake pad replacement really takes, with detailed time estimates, step‑by‑step breakdowns, tools needed, and tips for both DIYers and professional shops.
CONTINUE READINGRECENT POSTS
-

Why Upgrade to Alloy Wheels? Benefits, Performance, and Style
Discover why drivers switch to alloy wheels, from improving braking and fuel efficiency to enhancing car aesthetics and resale value.
-

Is it Cheaper to Install Your Own Car Battery? Costs and Pros and Cons
Discover if installing your own car battery is actually cheaper. We compare DIY costs vs. professional shops, cover core charges, and explain the risks of modern car electronics.